Pirate 4x4 banner

Frontier 4x4's 85 4Runner weekend warrior build

101K views 193 replies 68 participants last post by  lgraham09  
#1 · (Edited)
It was time for the Acura Alison has been driving to go, so now she's DD the 88 4Runner and that leaves me with this next project I just aquired. Plans are to quit wheeling the 88 before I destroy it and ruin it's grocery getter status. So to take it's place out on the trails, I found an 85 4Runner to transform into my DD and our weekend warrior for when we want to drive to the trails instead of trailering the 83.

I was dreading the painstaking search for a clean Toyota mini in the midwest until I came across this 85 4Runner only 130 miles away from me. We drove out to Omaha the next day and I drove it home.

Stats are:

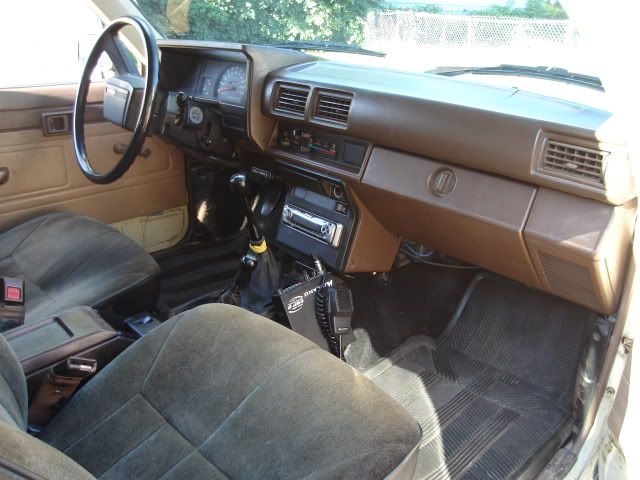
1985 Toyota 4Runner - bare bones
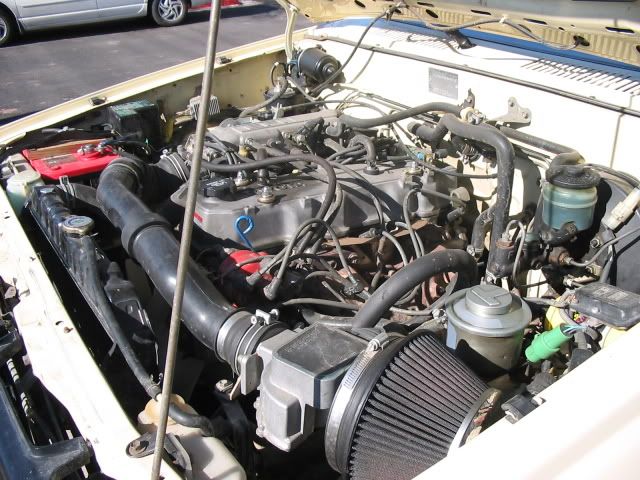
22RE
5-speed
188,000 miles. 10,000 on a rebuilt 93 22RE
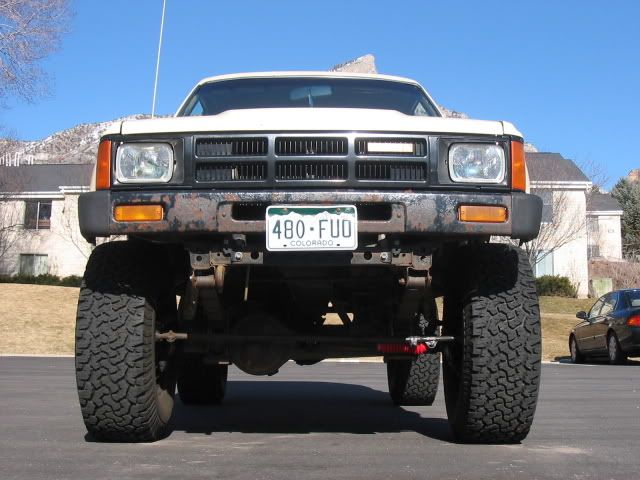
Has around a 3" lift springs.
33x12.5x15 BFG A/T's w/ full size spare
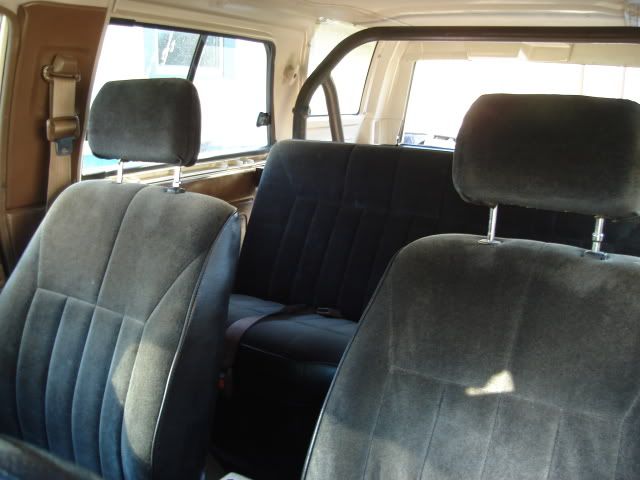
Reupholstered seats - actually pretty nice
Rock lights - they actually work

Image


Image


Image


Image


Image
 
#7 ·
Last time we took the 88 wheeling/camping we had no extra room. An extra 13.5" would be nice for spare parts and dogs. Some of the stuff I will be building and marketing might be for and un-bobbed 4Runner. This way I could build ready to ship parts like cages and rear bumpers for both bobbed and un-bobbed trucks.

The trucks going to get rebuilt from the ground up with new tires, lockers, steering, suspension, armor, cage, and paint. I'm working on finding and fixing all the little neglected stuff right now. Both t-case outputs are loose and it needs a rear u-joint. I had some wiring in the main harness going to the cluster I had to fix. I need to check the brakes out. All the little things that have gone unnoticed or neglected the last few years.
 
#8 ·
I was dreading the painstaking search for a clean Toyota mini in the midwest until I came across this 85 4Runner only 130 miles away from me. We drove out to Omaha the next day and I drove it home.
Nice. That is pretty clean for a midwest rig. Mine once looked close to that and its even the same color. :laughing:
 
#10 ·
Nothing interesting new on this rig yet. I've been driving it and taking care of all the stupid little neglected shit that bugs the hell out of me.

So far I have:

Fixed a wiring gremlin going to the instrument cluster
Got the temp mix switch lubed up and sliding like butta
Installed the missing fan shroud
Fixed the driver side window regulator
Tightened both loose transfer case yokes
Topped off the t-case fluid
Replaced the rear-rear u-joint
Foamy engine brighted all the oily stuff and got the drivetrain looking like new
Cleaned all the tree sap off the windows and top

I need to order a timing set and cover and get those replaced since it's making noise at start up. After that I'll get all the valves set and timing right on.

As soon I'm done with all the maintenance crap I'll get going on the good stuff!
 
#11 ·
My wheels showed up today so I got my 37x12.5x17 Cooper STT's mounted up on them. They are MRT 17x8 with 3.5" backspacing, non-reverse. I'm running 1.5" wheel spacers front and rear until I swap in the IFS rear then I'll be running them only on the front.

Image


For some reason the drop center is really deep on them and they had to machine down the centers to fit. It looks kinda funny at first but I'll roll with it. The beads should be on there pretty damn good since it took 140psi and beating the sidewall with a sledge to get the outside bead to pop and seat all the way. That makes me nervous everytime!

I think there is about 3" of lift currently on it. I have no idea what springs they are but the front axle isn't moved forward and whoever put the rear springs on mounted the hangers about 2" farther forward than where they should be. This puts the tire really close to the front of the wheel well and tons of room out back. I think I will be alright once I swap suspension as far as any rubbing since I will be correcting the wheelbase. I plan on leaving it the same height it is at now.

Image


Image


Image


My timing set and oil pump from engnbldr.com also showed up today so that will be going on shortly. I also gave it a full tune up with Toyota parts so that should be the last of the maintenance crap.

It will probably be awhile before another update. I need to bust out a bunch of work on the 83 to get it wheeling again after the roll last time out. I'm adding some more tube to the cage and rear bed. I'm planning on cutting the bed up and hanging the bedsides on tube.
 
#13 ·
The whole interior has been reupholstered. It's actually pretty nice, I dig it. The front rubs at full turn but it should go away after I move the axle forward, it's about stock location right now. If not, I'll tub the front. It's hard to tell on the rear because the wheelbase is fucked up. Once the rear axle is centered in the wheel well I think it will be pretty good. I don't plan on running much for uptravel.
 
#15 ·
Looks good.

So you need a timing set already??? I would expect more than 10k miles out of a set. I guess they could have rebuilt the motor and re-used the timing chain\gears but that would make me wonder what other shortcuts were taken.

It's probably too late now but make sure they didn't put the wrong oil pump bolt in (top bolt which interferes with the tensioner movement). The first time I ever did a timing set this is what happened - of course I already had everything ripped apart before I realized this.
 
#16 · (Edited)
I swapped the new timing set and pump on yesterday. No more rattling at start up now :smokin: I know about that bolt so I made sure it's in the right spot. I don't know much on the history of the motor so changing is more for peace of mind. The one I pulled off looked like it was in good shaped, the guides were still good but the tensioner wasn't as springy as the new one. That motor runs really good.

The only thing I'm still trying to get worked out on it is a slight shake when I hold the throttle steady at about 2500. It is unnoticeable driving under all conditions but if I am under the hood and hold the throttle, it will be smooth then drop off every couple seconds just enough to see, hear and feel it move. Any higher RPMS and it goes away. It was throwing a TPS code so I tested it, pulled it off, cleaned and adjusted it. I have a feeling it might have a dead spot in it right around that position.

But I did take it wheeling last weekend. It's been a long time since I wheeled something with both diff's open. It was fun!! I don't think have ever been that muddy before.

Image


whoops, that is really deep, it was above my headlight before I got back out of it. I had to dry out the distributor after the shower it received from the fan.

Image


Image
 
#17 ·
Well, the 83 is completely stripped down and all the drivetrain is going into the 85 for the winter. This includes built front and rear axles, longs, high steer, hydro assist, gusseted housing, 6 pin hubs, ifs calipers, vented rotors, and diff armor. I'm going to throw some 5.29's in the 3rds. I'm going to setup the dual cases with 23 spline 4.7's and twin sticks before throwing that in. I will be making a custom transfer case mount I plan on making available for sale. I'll also be working on a cage kit pretty soon.

Image


Image


the irok's are staying on this one for now and the 37 Coopers are now on my 88 4Runner.
 
#18 ·
I've been slacking on updates, these pics are from a couple months ago.

Front spring hanger is on using the springs from the 83. They are 2.5" skyjacker rears with one leaf from the rear of my 88 4runner cut down and added to the pack. The front axle is also from the 83. It has 30 spline longs and hub gears, Hendrix 6 pin, v6 calipers and vented rotors, Trail-Gear gussets/shock mounts, PSC hydro assist, Sky's high steer. New 5.29's are now in it.

The gusset behind the hanger is to strengthen the frame in that area.

Image


Image


I'll have more pics as soon as I get a replacement camera. With the new spring hanger I also got the IFS box mounted and hydro assist done. I haven't been wheeling yet but with no mods to the stock pump and reservoir it is quite and drives good. It doesn't puke fluid out of the stock reservoir either. I've been daily driving it this way for a couple months now.

The dual cases and crossmember are also in. Rear CV driveshaft is done. 5.29's are in the front axle.

I have everything to finish the following, just need the time now.


New rear spring and shackle hangers
Swap in the IFS rear and 5.29's
Rotate the pinion up for the CV drive shaft with new spring perches
Rear shock mounts
Front shock hoops
Front drive shaft
 
#21 ·
Here are some more recent pics of the IFS box, hydro assist, dual cases, and crossmember.

Flat pitman and I ended up notching the frame some so I could get it up and as far forward as possible. I didn't cut the body mount.

Image


hydro assist. I need to make a small pad for the bumpstops about 1/2" below the frame.

Image


Image


Image


dual cases. The crossmember is one I had laying around from Sky. The front stick just enough bend to the right to give it plenty of room for shifting into reverse. The rear stick is straight and works perfect with the center console. It clears in every position. I'm going to cut a whole in the trim piece that fits there and reinstall it after the twin sticks go in.

Image


Image


Image


I made a rear CV driveshaft and needed to clearance the factory crossmember some.

Image
 
#24 ·
It's just about time to start with the body armor and cage so I've been planning out what I want to end up with.

I want something that can take a beating and hold up to a roll if I end up going over. And still drive back from the trail.

I hate the way exo's looks but I don't want the pillars and windsheild to get trashed so I'm lean towards sort of a hybrid of sorts.

So I have come up running the tube directly on the sheet metal by keeping it seperate from the frame. I'll start by cutting out the rockers and replacing with 3x3 box from wheel well to wheel well. The cage and body will be tight fitting and should work as one similar to jeep body armor.

I'm not sure the stock body mounts are strong enough to hold up so I am considering completely replacing them with poly bushings attached to some short legs coming off of the inside of the new sliders. The old frame mounts will get cut off and no longer be used on the body side. The new rockers will be the new body support.

The rear cage will cover the rear seat part of the top and drop down between the windows to tie into a tube running along the top rail of the sheet metal from b-pillar to the rear corner. This tube will be supported through the body to the other side by removable spreaders using tube clamps behind the front and back seats.

The front tubework is going to drop into the fender by the windshield and tie into some more tube work all hidden by the front fender. Instead of a tube running from side to side below the windshield I will tie in the tube to the body where the door hinges bolt on.

I'm going to start with the sliders and see where it goes from there. First I have a couple more customer's cages to finish then it is on!
 
#26 ·
Cage is designed and ready to go. I'll finish the off the rear wheel wells when I start cutting them up to get measurements. The front section tucks nice under the front fenders just in front of the door hinges and I'll finish it off the rest once the main cage is done. I'm still working on how I want to make the front and rear bumpers.

The cross tubes through the body will be removable just to the inside of the interior using tube clamps when I'm not wheeling it. Everything should come out to being within a 1/4" of the body all the way around.

Image


Image


Image
 
#27 ·
Looks great man. I just picked one of these up myself.:D hope mine turn out this nice.(Ive been reading:flipoff2:) Im about to replace the timing chain on mine.(for the first time) We'll see how this goes. All Ive got is a Chiltons, FSM, and some common sense. I can do it right? :smokin:
 
#30 ·
Sliders...

Image


Image


Cut...

Image


there is a bunch of bullshit with two bolts holding it together from the door back, cut it out...

Image


Notch some spots for the future body mounts...

Image


The inner body panel make a bend outwards and messes with your plan so get rid of it....

Image


The front body mount will be angled back to clear the shackle...

Image


Weld that mofo in!! I skipped around some, didn't want to find out if it would warp with one continuous bead...

Image


Outside of tube is 5" out from the corner seam of the body...

Image


I smoothed out where the rocker meets the body with some liquid metal filler and added some primer.

Image
 
#31 ·
Rear mount to frame. I'm going to replace the front body mount the same way to reinforce the sliders and support the body.

Image


Image


Went wheeling at our club, 4x4 Syndicate's, spot and realized a few more projects to add to the list. Now I'm going to bob it and need to trim quite a bit out of the rear wheel wells.

I drove there and back 120 miles each way with no issues.

I have no idea what Mark and Erich are up to
Image


It was really icy out there, I slammed into this tree and shattered the glass

Image


The front shocks and hoops still need to go on.
Image


More sawzall!
Image